English
 Français
 عربى
عربى
A curtain rod blackout setup requires a rod mounted 10 to 20 cm (4 to 8 inches) above the window frame and extending 15 to 30 cm (6 to 12 inches) beyond each side, paired with blackout curtains that are wide enough to overlap the wall on both sides and long enough to pool slightly on the floor, sealing all light gaps. Double window curtain rods mount two parallel rods from a single bracket set, with the inner rod holding a sheer or voile layer and the outer rod holding a blackout or decorative drape, giving independent light and privacy control from one installation. A curtain rod for half window is a shorter rod mounted at the horizontal center of the window (the sash rail) displaying a cafe curtain that covers only the lower half, preserving light and view through the upper half. To assemble a curtain rod, simply extend a telescoping rod to the required width and lock the inner section, or connect a two-piece adjustable rod at the center join, load rings or thread curtains, then seat the rod in the wall-mounted brackets. Knowing where to put a curtain rod is the single biggest factor in how good the finished installation looks: mount high and wide to maximize the apparent size of the window. This guide covers every keyword with practical measurements and step-by-step detail.
Curtain Rod Blackout: How to Set Up a Rod That Actually Blocks All Light
A curtain rod blackout system is not simply about choosing a blackout fabric. The rod position, rod length, bracket projection from the wall, and curtain dimensions all determine whether the installation genuinely blocks light or merely dims it. The majority of light leakage complaints in blackout curtain installations come from incorrect rod placement rather than inadequate fabric.
Why Light Still Leaks Even with Blackout Curtains
Blackout fabric blocks light through the fabric itself, typically achieving 99 to 100% light blockage through the textile. But light leaks around the edges of the curtain because:
- Rod too short: A rod that barely reaches the window frame width forces the curtains to sit partially over the glass even when open, and when closed, the curtain edges align with the window frame rather than the wall, leaving a gap of light around the entire perimeter of the frame.
- Rod mounted too low: A rod mounted immediately above the window frame leaves a light gap between the top of the curtain rod and the ceiling, allowing reflected light to enter the room above the curtain line.
- Curtain not wide enough: Blackout curtains require significantly more fabric fullness than decorative curtains. Each panel should be at least 1.5 times the rod width (preferably 2 times for full blackout overlap) so when closed there is enough fabric to cover the entire rod width with no gap at the center meeting point.
- Bracket projection too shallow: If the bracket holds the rod too close to the wall, the curtain fabric presses against the wall surface and allows light to edge past the sides of the fabric stack.
Correct Rod Specifications for a True Blackout Setup
To achieve genuine light blockage rather than just light reduction:
- Mount the rod 15 to 20 cm above the window frame, or as close to the ceiling as the available wall space allows. The higher the rod, the more wall the curtain covers above the window frame, eliminating the top light gap.
- Extend the rod 20 to 30 cm beyond each side of the window frame. This extension allows the closed curtain panels to cover the wall on either side of the window rather than sitting over the glass edge, closing the side light gaps.
- Use curtain rings with blackout pins where the curtain meets the rod on eyelet or ring systems. The gap between the rod and the top of the curtain above the rings can allow ceiling-reflected light to enter; blackout clip strips or a cornice board above the rod closes this path.
- Choose a bracket with at least 8 to 10 cm of wall projection so the curtain hangs clear of the wall surface on both sides, allowing the fabric to hang straight and create a better seal at the sides.
- Allow the curtain to reach the floor and pool by 2 to 5 cm. A curtain that stops 1 to 2 cm above the floor leaves a visible light strip at the bottom, particularly in rooms with strong exterior lighting such as security lights or streetlamps.
Best Curtain Rod Types for Blackout Installations
Not all Curtain Rod types work equally well for blackout applications. The rod style affects how well the curtain fabric seals against light:
- Eyelet rod (with wide-diameter rod for eyelet curtains): Eyelet-top blackout curtains on a 28 to 35 mm rod have minimal gap between the top of the curtain and the rod. The eyelets alternate direction as they loop over the rod, creating a reasonably tight upper seal. The main light gap on eyelet installations is at the pleat crests (the portions of fabric that fold back toward the wall) where small triangular gaps form at the top edge.
- Pencil pleat tape rod (with curtain rings): Pencil pleat blackout curtains on rings have the fabric gathered evenly across the full width, which creates a better center seal but leaves more light gap at the very top between the ring and the rod. Use blackout heading tape or a pelmet board to close this gap for maximum light blockage.
- Pole with curtain track: The ideal solution for a blackout installation is a ceiling-fixed curtain track (as distinct from a decorative pole) because the track can be fixed close to the ceiling with the curtain carrier running inside the track profile, minimizing the gap between the top of the curtain and the ceiling. Combined with a blackout curtain that returns around the sides of the track to the wall surface, this creates a near-complete light seal.
| Window Width | Minimum Rod Length | Height Above Frame | Min. Curtain Width per Panel | Curtain Length |
|---|---|---|---|---|
| 60 to 90 cm | 100 to 150 cm | 15 to 20 cm | 75 to 100% of rod width | Floor to rod plus 2 to 5 cm pool |
| 90 to 120 cm | 150 to 180 cm | 15 to 20 cm | 75 to 90 cm per panel | Floor to rod plus 2 to 5 cm pool |
| 120 to 180 cm | 180 to 240 cm | 15 to 20 cm | 110 to 140 cm per panel | Floor to rod plus 2 to 5 cm pool |
| 180 to 250 cm | 240 to 310 cm | 15 to 20 cm | 140 to 180 cm per panel | Floor to rod plus 2 to 5 cm pool |
Double Window Curtain Rods and Curtain Rod for Double Curtains: Full System Guide
Double window curtain rods are one of the most practical window treatment upgrades available because they create a layered system from a single set of wall fixings, allowing two independent curtain layers to be controlled separately without the visual clutter of two separate bracket sets. Understanding what to look for and how to specify a curtain rod for double curtains prevents the most common installation problems: insufficient clearance between layers, inadequate bracket load capacity, and mismatched rod diameters that cause visible hardware inconsistency.
How a Double Curtain Rod System Works
A double curtain rod bracket consists of a single wall-mount plate with two arm projections of different lengths. The shorter inner arm (typically projecting 5 to 7 cm from the wall) holds the inner rod closer to the glass for sheer, voile, or privacy panels. The longer outer arm (typically projecting 10 to 15 cm from the wall) holds the outer rod for the main drape: blackout, lined, or decorative curtains. The two rods run parallel to each other, allowing each curtain layer to be drawn independently. The gap between the two rod positions should be at least 4 to 5 cm to allow the curtain layers to move past each other without catching.
The Most Common Uses for Double Window Curtain Rods
- Sheer plus blackout in bedrooms: The most popular double rod application. The inner rod carries a white or cream voile panel that softens daylight and provides privacy from outside view during the day. The outer rod carries a blackout panel drawn at night for sleep quality. Both layers operate independently so the room can be in any of four states: both open (maximum light), sheer only (soft light and privacy), blackout only (dark with no privacy layer), or both closed (complete darkness).
- Decorative plus thermal in living rooms: A decorative sheer inner layer softens the room's appearance while a thermally lined outer curtain is drawn on cold evenings to insulate the window. The two-layer approach allows decorating function and energy function to be served by different materials selected for each purpose.
- Privacy plus statement drape: In rooms where the curtain is a significant decorating statement, a simple white inner voile provides daytime privacy while a heavily textured, patterned, or boldly colored outer panel becomes the visual focal point of the room when drawn for the evening.
Selecting the Right Double Rod Bracket for the Job
The bracket is the structural element of a curtain rod for double curtains system, and selecting an underspecified bracket is the most common cause of double rod system failure. Key bracket selection criteria:
- Total load capacity: Add the weight of both rods and both curtain panels and confirm the bracket is rated above this total. A set of heavy blackout curtains on the outer rod plus sheers on the inner rod can total 8 to 15 kg for a standard 200 cm window. Choose a bracket rated for at least 20 kg per bracket for peace of mind in this load range.
- Arm projection difference: The outer arm must project at least 4 to 5 cm more than the inner arm to create working clearance between the two rod-plus-curtain-layer combinations. Brackets with less than 4 cm projection difference cause the curtain layers to press against each other and bind when operated.
- Rod diameter compatibility: Inner and outer rods are often different diameters. The lighter inner sheer rod is frequently 19 to 22 mm diameter; the heavier outer rod is frequently 25 to 28 mm. Confirm the bracket cups match the rod diameters you have selected.
- Material and finish consistency: All bracket hardware (outer and inner arms, both rods, and finials) should share the same surface finish. A mix of polished and satin finishes in the same installation reads as an error rather than a deliberate design choice.
Installing Double Window Curtain Rods: Sequence and Tips
- Mark and verify bracket positions at equal heights above the window on both sides using a spirit level. Double brackets are heavier and have more complex geometry than single brackets, making a small spirit level across the two positions essential rather than optional.
- Drill and fix with appropriate anchors for the wall type. Double curtain rod brackets require three screws per bracket rather than two because the extended bracket arm creates a larger bending moment at the wall fixing. Use solid masonry anchors (6 to 8 mm rawlplugs) in brick or concrete, or stud fixings in timber-frame walls.
- Thread the inner rod and sheers first, then seat the inner rod in the inner bracket cups and secure the retaining screw before handling the outer rod. Working from inner to outer prevents the already-hung rod from being in the way when threading the second curtain.
- Thread the outer rod and main drapes, then seat in the outer bracket cups. Fit finials on both rods. Test both curtain layers through a full draw cycle (open and close each independently) before considering the installation complete.
- Check the gap between layers by reaching between the two curtain panels. You should be able to move the inner curtain independently without it catching on the outer curtain rings or rod. If layers are too close, adjust by swapping to a bracket with a greater projection differential.
How to Assemble a Curtain Rod: Every Rod Type Covered
Knowing how to assemble a curtain rod correctly before installing it on the wall prevents the two most common assembly errors: over-extending a telescoping rod beyond its structural limit (causing bowing or joint failure), and threading curtains in the wrong order so the rod must be re-threaded after the brackets are already fixed. The assembly sequence depends on the rod type.
Assembling a Telescoping Curtain Rod
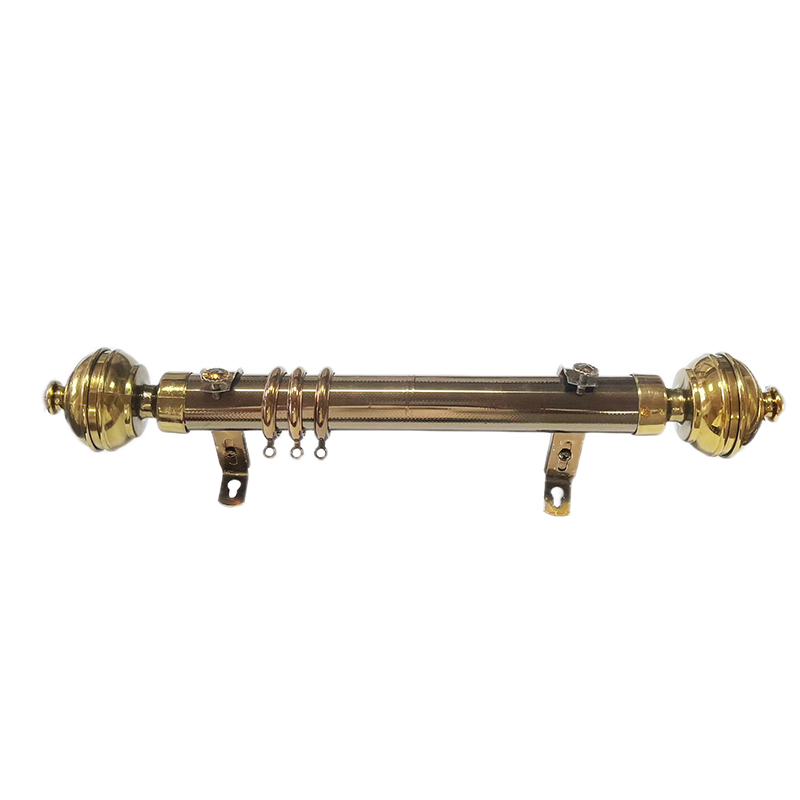
A telescoping (extendable) Curtain Rod consists of an outer tube and a narrower inner tube that slides inside it. The inner tube is locked at the required extension using a twist-lock collar, a tension friction mechanism, or a spring-loaded pin that clicks into holes drilled at standard width intervals in the inner tube.
- Measure the window width and calculate the required rod length: window width plus 30 to 60 cm (15 to 30 cm extension each side for decorative use, or 40 to 60 cm total for blackout use). Set the rod to this length before loading any curtains.
- Extend the inner tube to the required length. Pull the inner tube until the measurement mark or the pin hole at the desired width aligns with the end of the outer tube. For a twist-lock system, extend to length and rotate the outer tube clockwise (tightening direction) until the friction lock grips the inner tube firmly. Test the lock by pulling both ends gently in opposite directions: there should be no movement.
- Do not extend beyond the rod's maximum rated length. Each telescoping rod has a maximum span printed on the packaging or in the product specification. Extending beyond this limit moves the rod into the region where the joint overlap is too short to provide adequate structural support, causing the rod to bow under curtain weight. A standard 19 mm telescoping rod extended beyond approximately 150 cm will bow noticeably under medium-weight curtains without a center bracket.
- Thread the curtains before inserting in brackets for rod-pocket curtains. Rod-pocket (cased-heading) curtains must be threaded onto the rod before the finials are fitted and before the rod is placed in the wall brackets. Once in the brackets, the rod cannot come out of one end to thread a rod-pocket curtain without dismounting from the brackets. Load the curtain by gathering the fabric onto the rod from one end, working the pocket along the rod until the full curtain is on, then fit the finials.
- For ring-top or eyelet curtains, thread after the rod is in the brackets. Rings can be loaded onto the rod while it sits in the bracket cups by sliding them from the end of the rod before fitting the finial. This is significantly easier than threading the rod through the curtain rings first and then lifting a loaded rod into the brackets.
Assembling a Two-Piece Fixed-Length Curtain Rod
Fixed-length rods for wider windows are often supplied in two sections that join at a center coupler sleeve or a threaded connector. Assembly:
- Lay both sections end to end on a flat surface. Identify the coupler (a short tube sleeve) or the threaded fitting at the join end of each section.
- Slide the coupler sleeve over the end of one section (for sleeve-join rods) or thread the two sections together at the connector (for threaded-join rods). The join should be snug with no visible gap or wobble at the connection point.
- Mark the center bracket position at the join. For rods above 180 cm in total length, a center bracket is required. Position the center bracket to straddle or just clear the center join so that the most structurally vulnerable point on the rod (the join) is also the most supported point.
- Thread curtains before completing the join if using rod-pocket curtains. Thread one panel on each section, slide the center coupler, and complete the join. The curtain panels now sit on either side of the center bracket when installed.
Assembling Curtain Rings Correctly
Curtain rings allow the curtain to slide smoothly along the rod and are used with clip-top, eyelet-alternative, tab-top, and pencil-pleat curtains where rings are preferred to direct rod threading. Correct ring assembly:
- Load the correct number of rings. For a standard pencil-pleat curtain, attach one ring to every 8 to 10 cm of curtain heading tape hooks, which for a 150 cm wide panel means approximately 15 to 18 rings per panel. Too few rings allows the curtain to sag between attachment points; too many is unnecessary but not harmful.
- Thread rings onto the rod before mounting. Slide all rings for both panels onto the rod from one end (before the finial is fitted on that end) in the correct quantity and position. Fit the leading edge ring (the ring that will sit at the center of the rod when curtains are closed) last so it is in the correct position.
- For clip rings, attach clips after the rod is mounted. Clip-top rings (with an integrated alligator or pinch clip at the bottom) can be loaded onto the rod first, then the curtain clipped to the rings after the rod is in place in the brackets. This is the most convenient system for hanging any curtain without threading.
Where to Put a Curtain Rod: Height, Width, and Position Rules
Understanding where to put a curtain rod is the most visually consequential decision in any curtain installation. The same curtains hung in the wrong position look mediocre; hung in the right position they transform the proportions of the window, the wall, and the room. The rules are straightforward, consistent, and supported by specific measurements.
Height: The Rule That Changes How Rooms Feel
The most impactful single decision in curtain rod placement is height above the window frame. The higher the rod above the frame, the taller the window appears and the larger the room feels. Specific height guidelines:
- Standard installation (ceiling 2.4 to 2.7 m): Mount the rod 15 to 20 cm (6 to 8 inches) above the window frame. This is the recommendation of most interior designers for typical residential ceiling heights.
- High-ceiling installation (ceiling above 2.7 m): Mount the rod 15 cm below the ceiling line rather than above the window frame. A rod high on the wall with floor-length curtains makes the room feel dramatically taller, regardless of the actual window size.
- Low-ceiling compensation: For rooms with low ceilings below 2.4 m, mount the rod as close to the ceiling as the available wall space allows (ideally within 5 to 10 cm of the ceiling). This creates the maximum illusion of ceiling height for the space.
- Practical measurement method: Instead of measuring the same distance above the window frame on both sides (unreliable because the frame is often not perfectly level or the floor-to-ceiling height varies slightly), measure from the floor up on both sides. Use a laser level or a long spirit level to mark both bracket positions at exactly the same height from the floor. This guarantees a level rod regardless of any irregularity in the window frame or ceiling.
Width: How Far Beyond the Window the Rod Should Extend
The rod width determines how wide the window appears and how much light enters when the curtains are fully open. The standard recommendation is to extend the rod 15 to 30 cm (6 to 12 inches) beyond each side of the window frame. The benefit of this extension is twofold:
- Full light when open: When curtains are drawn back to the sides of the rod, the entire curtain fabric stack sits on the wall rather than partially overlapping the window glass. A rod extending only 5 cm beyond the frame forces the curtain to cover 10 to 15 cm of glass on each side even when fully open, which significantly reduces the light entering the room.
- Wider apparent window: The full visual width from the outer edge of one curtain panel to the outer edge of the other defines the perceived window width. A rod extending 25 cm per side makes a 120 cm wide window appear approximately 170 cm wide when the curtains are open, which is a significant visual expansion for the room.
Curtain Length: Where the Bottom of the Curtain Should Fall
The curtain length determined by the rod position is as important as the position itself. Three length options, each creating a distinct look:
- Hovering (1 to 2 cm above the floor): The most formal and space-efficient floor-length finish. Gives a tailored, intentional appearance and is the most practical for rooms where the curtains will be moved frequently because the fabric does not drag on the floor.
- Pooling (5 to 15 cm of extra length): A deliberately romantic and luxurious finish where extra fabric puddles on the floor in a soft heap. Most appropriate for formal bedrooms, drawing rooms, and spaces where the curtains are rarely moved. Not practical for families with children or pets.
- Apron length (to the window sill or 15 to 20 cm below it): Used when floor-length curtains are not practical because furniture, a radiator, or a fitted seat sits in front of the window. See the half-window section for this style applied specifically to the lower half of a window.
| Ceiling Height | Rod Height Above Frame | Side Extension per Side | Visual Goal |
|---|---|---|---|
| Under 2.3 m | Near ceiling (5 to 8 cm from ceiling) | 15 to 20 cm | Maximize height illusion |
| 2.3 to 2.5 m | 10 to 15 cm above frame | 20 to 25 cm | Standard elegant finish |
| 2.5 to 2.8 m | 15 to 20 cm above frame | 20 to 30 cm | Balanced proportion |
| Above 2.8 m | 15 cm below ceiling | 25 to 35 cm | Dramatic grand-scale finish |
Curtain Rod for Half Window: Cafe Curtains, Privacy Solutions, and Installation
A curtain rod for half window is mounted at the horizontal midpoint of the window (at or just above the lower sash rail in a double-hung window, or at the center of a fixed window) to display a cafe curtain covering only the lower half. This setup is the classic solution for windows where you want privacy at eye level from the street while retaining natural light and sky view through the upper half. It is particularly popular for kitchen sink windows, bathroom windows, and any ground-floor window facing a public street or pavement.
Where Exactly to Position a Half-Window Curtain Rod
The correct position for a half-window rod depends on whether the goal is pure privacy, light management, or aesthetic proportion. Three positioning options:
- At the mid-rail (sash center) of a double-hung window: Mount the rod directly on the horizontal sash bar that separates the upper and lower glass panels. This is the most common half-window rod position for kitchens. It makes the cafe curtain align precisely with the window's existing horizontal divide, looking intentional and architecturally integrated.
- At the lower third of the window: Mount the rod approximately one-third of the way up from the sill. A shorter cafe curtain at this position covers only the lower portion of the window, providing privacy to anyone seated in the room while leaving the upper two-thirds of the glass fully clear.
- At the halfway point measured from the sill: Mount the rod at exactly 50% of the window height measured from the sill. This gives equal coverage of the lower half and equal open glass above, the traditional cafe curtain proportion.
Mounting Options for a Half-Window Rod
A half-window rod can be mounted in three ways, each with different fixings:
- Inside the window recess (inside mount): The rod fits within the window reveal (the recessed frame of the window opening in the wall). Standard wall bracket cups screwed into the side reveals hold the rod. Inside mounting gives the cleanest look, keeping the rod, curtain, and all hardware within the window outline. Measure the inside reveal width precisely for the rod length; a rod too long cannot be seated in the inside brackets.
- On the window frame face (outside mount at frame width): The rod is mounted on the outer face of the window frame rather than inside the recess. Standard wall brackets are screwed into the timber or uPVC window frame material. This is the most common mounting for replacement windows where the reveal depth is too narrow for inside-mount brackets.
- Tension rod (no-drill): A spring-loaded tension Curtain Rod that braces between the two side reveals without any screws or drilling. Ideal for rental properties, for tiled bathroom windows where drilling through tile is undesirable, and for temporary or seasonal cafe curtain applications. Load capacity is limited to approximately 3 to 5 kg, appropriate for lightweight voile or sheer cafe curtains but not for heavier fabrics.
Choosing the Correct Curtain for a Half-Window Rod
The curtain for a half-window rod is called a cafe curtain and should have a drop (length from the rod to the hem) equal to the distance from the rod to the window sill plus 1 to 2 cm. Cafe curtains that fall exactly to the sill look precise and intentional. Cafe curtains that fall several centimeters below the sill look heavy and disproportionate. Appropriate fabric types for cafe curtains:
- Sheer voile or organza: The most popular cafe curtain fabric for kitchens and bathrooms. Allows light to pass through softly while preventing direct eye-level view from outside.
- Linen or cotton: For a more opaque, country-style, or Scandinavian aesthetic. Lightweight natural fiber cafe curtains look appropriate in kitchen and dining settings.
- Embroidered or printed cotton: Decorative patterned cafe curtains work well in traditional cottage and farmhouse kitchen contexts, adding color and character to the lower window area without visually closing the space.
Curtain Rod Diameter, Length, and Material: How to Choose the Right Specifications
Every Curtain Rod purchase decision involves three structural variables that determine whether the rod performs reliably over its lifetime: diameter (which controls stiffness and load capacity), length (which must match the window width plus extensions), and material (which affects weight, corrosion resistance, aesthetic, and cost). Choosing any of these incorrectly results in either a bowing rod that damages the installation's appearance or an overspecified, unnecessarily expensive product.
Rod Diameter and Load Capacity
The rod diameter is the single most important structural variable. Bending stiffness (resistance to deflection under load) increases with the fourth power of the radius, meaning small increases in diameter deliver very large increases in stiffness. A 28 mm rod is significantly stiffer than a 22 mm rod of the same material at the same wall thickness:
- 16 to 19 mm diameter: For lightweight sheers and voiles, cafe curtains on short spans, and inner rods in double rod systems carrying lightweight fabrics. Maximum unsupported span: 90 to 100 cm. Load capacity: approximately 3 to 5 kg total.
- 22 to 25 mm diameter: The most widely used residential rod size for standard weight unlined and lightly lined curtains. Maximum unsupported span: 120 to 150 cm. Load capacity: approximately 8 to 12 kg total.
- 28 to 32 mm diameter: For medium to heavy lined curtains and blackout panels. The standard specification for most living room and bedroom applications. Maximum unsupported span: 150 to 200 cm. Load capacity: approximately 12 to 20 kg total.
- 35 to 50 mm diameter: For very heavy fully interlined curtains, large windows above 250 cm, and architectural premium applications where the rod is a design statement as well as a structural element. Maximum unsupported span: 200 to 280 cm. Load capacity: 25 to 50 kg total.
Rod Material Comparison
| Material | Weight (28 mm, 180 cm) | Rust Risk | Max Load (with brackets at 90 cm) | Best Room |
|---|---|---|---|---|
| PVC | Under 300 g | None | Up to 7 kg | Bathroom, shower, wet room |
| Aluminum | 400 to 600 g | None | 12 to 20 kg | All rooms, general use |
| Steel (powder coated) | 1.2 to 1.8 kg | Low (if finish chips) | 15 to 25 kg | Living room, bedroom |
| Wrought iron | 2.5 to 4 kg | Moderate (needs waxing) | 30 to 50 kg | Traditional or period rooms |
Frequently Asked Questions About Curtain Rods
1. What is a curtain rod blackout setup and how do I stop light from leaking around the edges?
A curtain rod blackout setup requires the rod to be mounted 15 to 20 cm above the window frame and extended 20 to 30 cm beyond each side, paired with blackout curtains wide enough to cover the wall on both sides of the window when closed. To stop light leaking around the top, add a valance, cornice board, or ceiling-fixed track. To stop side leakage, ensure the curtain panels overlap the wall (not just the frame) when drawn closed. To stop bottom leakage, allow the curtains to pool by 2 to 5 cm on the floor. The rod position matters as much as the blackout fabric itself.
2. How do double window curtain rods work and what is the gap between the two rods?
Double window curtain rods use a single bracket with two arm projections of different lengths, mounting two parallel rods at 5 to 7 cm (inner) and 10 to 15 cm (outer) from the wall. The gap between the two rod positions is typically 4 to 6 cm, which is enough for each curtain layer to move independently without catching on the other layer's rings or fabric. The inner rod carries a lightweight sheer or voile; the outer rod carries the main drape. Both layers can be drawn independently for any combination of light and privacy settings.
3. What size curtain rod do I need for double curtains (a curtain rod for double curtains)?
For a curtain rod for double curtains, the outer rod carrying the main heavier drape should be at least 28 mm in diameter for spans above 150 cm to prevent bowing under the combined weight of the fabric and rings. The inner rod carrying the lighter sheer can be smaller, typically 19 to 22 mm. Both rods should be the same length: window width plus 40 to 60 cm total (20 to 30 cm extension each side). The bracket must carry the total weight of both rods and both curtain panels; always verify the bracket's published load rating exceeds this combined weight by at least 30%.
4. How do I assemble a telescoping curtain rod without it sliding back in?
To prevent a telescoping rod from sliding back after assembly, ensure the twist-lock collar is tightened firmly (rotate the outer tube clockwise until resistance increases and the inner tube no longer moves when pulled). If the rod uses a spring-pin lock, confirm the pin has fully engaged in its hole. If the rod uses friction only and tends to collapse under curtain weight, apply a small wrap of self-amalgamating silicone tape around the inner tube at the overlap point before extending, which increases the friction surface area and prevents slippage without adhesive residue. Never exceed the rod's maximum rated extension, as over-extension reduces the overlap length and the friction surface.
5. Where exactly should a curtain rod be placed for the best visual effect?
For the best visual effect, place the rod 15 to 20 cm above the window frame (or near the ceiling for rooms with high ceilings) and 20 to 25 cm beyond each side of the window frame. These two adjustments (high and wide mounting) are the most cost-effective way to make windows look larger, rooms feel taller, and curtains look professionally installed. A rod mounted immediately above the window frame and barely wider than the glass gives the room a compressed, low-budget appearance regardless of how much the curtains cost.
6. What is the correct rod for a half window?
A curtain rod for half window is typically a small-diameter (16 to 22 mm) rod of exactly the window's inside width (for an inside mount in the reveal) or the window frame width plus 5 cm each side (for a frame-face mount). The rod is positioned at the horizontal center of the window, at the sash rail in a double-hung window, or at 50% of the window height measured from the sill. Tension rods (no-drill, spring-loaded) are very popular for half-window applications, particularly in tiled bathroom windows, as they require no drilling and can be repositioned easily.
7. How many brackets do I need for a curtain rod?
Use two end brackets for rods up to 150 to 180 cm with light to medium weight curtains. Add one center bracket for rods between 180 and 270 cm, positioned at the midpoint of the span. For rods above 270 cm, space brackets at intervals of no more than 90 cm and add as many intermediate brackets as needed to maintain this spacing. For double window curtain rods, apply the same spacing rules to the combined load system and verify the double bracket's total rated load capacity is adequate for both rods and both curtain sets.
8. Can I use the same rod for both blackout and sheer curtains?
Yes, but only in sequence, not simultaneously on the same rod. A single rod can hold a blackout curtain at night and be replaced with a sheer for a seasonal change. To hang both simultaneously (sheer visible during the day, blackout drawn at night), you need a double window curtain rod system with separate inner and outer rods, not a single rod with both fabrics. Attempting to hang both a sheer and a blackout on the same single rod makes independent operation impossible and produces a cluttered, difficult-to-manage installation.
9. What is the best curtain rod for a bathroom window?
The best Curtain Rod for a bathroom window is either a PVC rod (completely rust-proof, lightweight, inexpensive, ideal for shower curtains and lightweight cafe curtains in wet rooms) or a matte black anodized aluminum rod (if the black aesthetic is desired and the bathroom requires a rod for heavier window curtains where PVC's limited load capacity is insufficient). For a half-window bathroom application, a no-drill tension rod in PVC or aluminum is very practical as it avoids drilling through bathroom tiles. Avoid standard steel rods with paint or chrome finish in bathrooms as the coating eventually chips and the steel beneath rusts.
10. How do I stop my curtain rod from sagging in the middle?
To stop a curtain rod from sagging: the primary solution is to add a center support bracket at the midpoint of the rod span, which is the correct engineering response to mid-span deflection. Secondary solutions include switching to a larger diameter rod (a 35 mm rod instead of 28 mm for the same span has dramatically greater stiffness) or switching from a lighter material (PVC or thin aluminum) to a stiffer material (thicker aluminum or steel) for the same diameter. Do not add more weight to an already-bowing rod by adding more curtain fabric; address the structural cause (inadequate rod stiffness for the span and load) rather than trying to work around it.